Sunday 30 November 2014

DMUGA Week 9 - Getting there...

I love Mondays! We get the whole day (if we want to), just to focus on 3D/Anything Game Production related, and even though it is technically around 8+ hours spent either modelling, textuing, or in the Game Engine, for me it is one of the most enjoyable/relaxing activity... Provided there aren't problems which can be a hassle to solve!
Anyway, as you may already sense, Monday was used to model and unwrap my robot character, 'Blue'. I made some great progress with him and this is the state I got him to on Monday:


Here's something you don't often here me say... Life drawing this week went kind of well! It would have been better if I actually bought a brown-papered sketch book and a white pencil/chalk, but it wasn't all too bad. This week we started something different; instead of 1 1.5 hour session of life drawing, visual design, then more V.D after lunch, we can now have 2 sessions of life drawing, 1 V.D, and the rest of the afternoon will be free for the tutors to give us feedback on our current work. That's awesome! It was a bit crowded in life drawing, but definitely manageable.
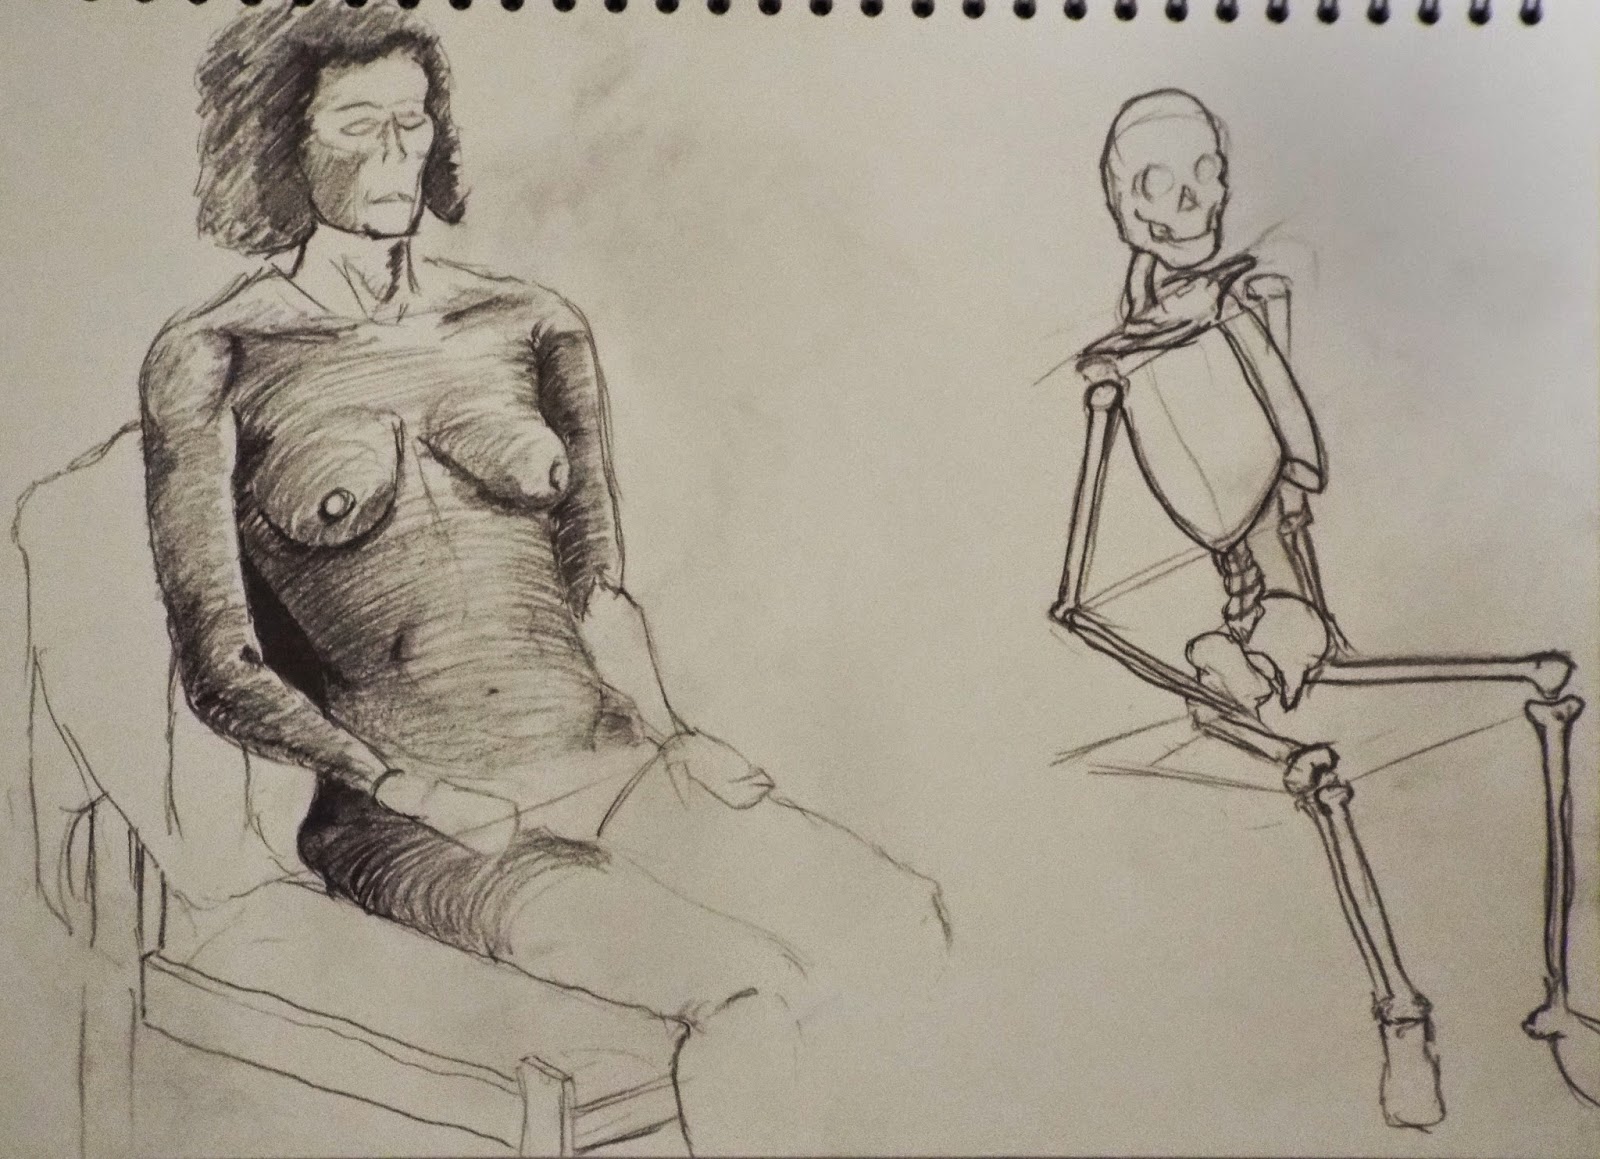
Morning session Life drawing:


Afternoon 35min Life drawing (Used a donkey instead of an easel):


Mike Kelly's demonstration on 'Photobashing' was quite an interesting thing to see. I've heard and seen people doing it before, but never really understood how they could 'bash' almost anything into their piece and still have it make sense/look good. I will no doubt be hopefully using this technique soon in the future (where appropriate) because it looks like a lot of fun!

In terms of my character project progress for Tuesday, I finished modelling 'Blue' and pretty much unwrapped him - Had an extremely frustrating problem with the UVW packing because the shapes are just so 'curvy', there is going to be a lot of wasted space no matter what I do. This will make me lose marks because it doesn't appear efficiently packed... When in fact, it's probably the best damn pack you can get from this one!

Unfinished UVW Packing for 'Blue' - Overlapping UV'S +Couldn't fit
After a comment from Mike's short discussion with me today, I had a think about how I could make my characters more dichotomous and what I came up with wasn't all that bad. I currently have a good, innocent robot + girl... Why not make the robot the same size, just a bit more evil?

When it came to Wednesday, I knew I had to add something to the robot to make him a bit more intimidating, but still play on the fact that he is pretty small, and therefore, not very threatening. All I did was change a few shapes, the body colour, and the eye colour from blue to red, but it still works!


I also got the rest of the girl modelled & unwrapped; aside form the head.


Thursday was a very interesting day for the design for my robot character. I tried out a lot of different colour schemes, as well as separated different elements out in terms of light and dark in order to give it some more 'punch' visually.


I also tried out some colour for the girl character too, just to see what works and what doesn't. The problem I have now is that I have to make both of their colours go well together. This is the progress I made:


On Friday, I tweaked the robot's topology and gave it a good base colour/texture just to see how it's looking so far:

Marmoset Render
Very crude composite, background image found here: http://i.huffpost.com/gen/1418108/thumbs/o-SNOW-facebook.jpg
UE4
UE4
Over the weekend I also managed to rig the robot to a good degree, and do the asset document:

After making my robot slip over on an invisible banana skin, I was fairly happy with the rig itself, but there are definitely a couple of issue I'll need to fix, but other than that I quite like him!

Overall, I really enjoyed this week and I think it has gone pretty well. However, I'm still disappointed in myself that I haven't yet come up with a face for the girl and I cannot proceed with her unless I decide on this... Not sure how the following week is going to pan out, but I'm excited to see what cool characters other people have come up with!

Sunday 23 November 2014

DMUGA Week 8 - Character Project... A little bit hectic!

So, we come to our first character project for this year and what a delight it is that we get to literally pick what we want to do. This is great creative freedom, and a luxury to have, however, I do like some guidance on what to make, and therefore the first part of this week was a bit of a struggle. When we were briefed last Thursday for this, I thought there was potentially so much we could do, but at the moment, I feel rather rushed - Leading me to make some bad decisions, and not coming up with anything particularly marvellous/original. By Thursday Morning, we are supposed to have a model sheet to begin modelling one of our character in 3D, plus, finalised concepts; lets see how I got on...

Having only just begun a mood-board over the weekend, I literally didn't have any idea as to what direction I wanted to take by Monday. This was good because it meant I wasn't constricted to the first idea I had in my head and I was open to any possibilities. However, I still wasn't particularly clear by the end of Monday on what I was drawn towards.


Tuesday was a little bit better because I made some sort of progress in the idea selection and kind of had an incling as to what to proceed with. Before I explain myself, I'll talk about what we did in our visual design & life drawings classes.
In came the skeleton, and we posed it next to our life model in a similar pose (emphasis on similar!), and drew them side by side to try and understand the structure underneath by having it visually right in front of us:


During Chris' session, we showed our work to our fellow students and peer/self assessed ourselves on the sentry gun project. We marked ourselves against the criteria, then had our peers either agree or disagree with our self-marking. I quite enjoyed this, but I usually mark myself down/am too harsh. In addition, we began to make some human armatures out of wire, starting with the spine & skull, then building on from there. I haven't yet made much progress on mine, but I can assure you that I'll post some pictures of him when he's done!
By Tuesday evening, I still wasn't sure what to do (narrowed it down to something robotic & or a child), and it felt as if the presentations on Thursday were so close and I hadn't even begun sketching!:


I made the most progress on Wednesday in terms of clearing a lot up for one of my characters, the robot named "Scrap". I began to work on a silhouettes which I picked and I did so because the curve on the back was going to be some sort of shell, indicating timidness. However, this just wasn't working as well as I wanted it to. I mean, if I worked on it, it'd be alright - not too bad. I therefore scrapped it (no pun intended), and came up with a different one, I even thought about working on the one I did on the page of brainstorm sketches (it was a desperate move, but not acted upon!):


I began to develop one and it almost evolved out of nowhere and I just went with it. By Wednesday night, I had a moderately good robot, with somewhat of an emotion and scale - It just needed something more to indicate it's characteristics a bit more (Like the shell idea from the first one). Despite this, I made a front view of Scrap, and would have to push his idea further on Thursday.


On Thursday, we had to present our ideas to Emma and Mike to see how we were getting along with our ideas/drawings. I have to admit, as usual I was kind of nervous but I'd like to think I'm getting a bit better at presentations (Woohoo!). The bottom line for my work was that they like the idea of a little girl and a robot (Stylised) however, my robot I came up with was far too comparable to the 'Iron Giant', and therefore, people are more likely to judge my work against it. Thus, if I were to pick this idea, I would have to do it even better than the original, and put my own spin on it to make it even more unique.
It actually happened to be that they seemed to like a different set of silhouettes on my scale page; The girl with an even littler robot. This is because it implies an owner/pet relationship as opposed to the one I had before which was more like the robot was overpowering the little girl. I therefore chose the silhouettes that they really liked and started to develop those further.
After some thought, I came up with these:


I have begun modelling 'Blue', the little robot character, and this is the progress I've made so far with him:


I have having some trouble with the 'wings'/arms at the top as as well as his feet, so I'll have to really figure out how to model them correctly and just how I want them to look.

Overall, I'd say a pretty productive week, as I've made some creative decisions that I like and I', moderately ok with the progress made so far. I aim to model both characters, so I'll have to work fast on Blue, so that I can get to work on the little girl of whom I have not yet named... Need some ideas!

Sunday 16 November 2014

DMUGA Week 7 - Sentry finalisation (Post-mortem) + new character project?...

This is the final week we have in order to complete our sentry gun and I can't wait to see what sort of character we have to make - it doesn't feel that long ago that I was saying the same thing about the film scene project! Making the sentry gun has been a lot of fun, but as with everything, I wish I had done more development and refinement. This is a common problem which I hope will be at least improved by following the method that Chris has told us about this week.
With this method, I hope to improve my workflow and how I go about my creative decisions in order to end up with a refined design that I am happy with.

Monday's class with Craig was so helpful to me that I'd still have been 1 step behind if I didn't ask a couple of questions. One of the questions I asked was about Z-brush. I know this is rather late, but I haven't used Z-brush yet to make any of the models I've produced for the duration of my course. I simply asked about how to go about importing a low poly mesh, subdividing it, how to sculpt on it, then export it. This is such a vital process for getting low poly meshes with good looking normal maps, creating a nice, organic feel to the model, and therefore, more realistic. I am so happy to have a very basic understanding of this, alongside a baking method also demonstrated in this lessson.

Another question was about how to get lights to attach to a mesh and move with it as it moves through space. Even though we didn't get to figure this one out, it was very good to just relay comments which actually made me decide to just change the emissive map which wasn't actually right (solving a problem).


During Monday, I also managed to get into cascade in UE4 and mess around with the particle effects which were already in the file given to us. I know I didn't personally make the textures that make up the particles, I still learnt a great deal and made progress in the world of particle effects. I changed the lifetime, size, light emitted, layered particles, and changed the colour of them. The particle effects window is something I would have previously been scared of, but I now feel excited to see it open and I really can't wait until I start making my own textures to be used for different effects.


I more or less finished off the main textures for everything on Monday, but tweaked them slightly on Tuesday along with the particle effects.

Tuesday was a little bit different this week because we had a lecture from Jeff - experienced in life drawing. We had our usual lessons, just squashed into the morning sessions. Life drawing this week focused on heads/shoulders which I found very useful to do as I really struggle with drawing the face & capturing the essence with not a lot of detail.


Not the best drawings, but it's good that we had this time to only look at faces, I think that having done that, I will be more likely to actually put a half-decent looking face in my life drawings instead of leaving it to the last moment and potentially ruining the drawing.

Later on during this week on Thursday, we had a little session to introduce us to the next character project. There was a lecture to brief us all on what we'd be doing, and a seminar to go into some depth. Within this, we did a few quick 2min sketches of the people around us and tried to emphasise some of their features (or in my case, just simplify the face).


The brief for this project is to design/concept 2 characters who belong together, but have completely different characteristics/personalities (Also known as dichotomy). For example, Shrek and Donkey, are 2 characters who are almost nothing like each other, and yet, they seem to work very well as a duo:


The brief is to design two characters, but leaning towards more humanoid ones. By the end of the project, we should have modelled and textured at least 1 of them, and perhaps with an idle animation.As of this moment, I have no idea where I want to go with this one, but the only way to find out is to research... The first part in Chris' design process.

Throughout the rest of the week, I just kept adding into the Unreal Engine file, trying to do more and more things with my sentry gun. With the help of fellow pupils, I managed to get some sound working whenever the sentry gun is fired. I solved the problem where I wanted to attach lights to the moving mesh, and, I also managed to get a laser beam to work and follow the player as it rotates:


Some work which I previously forgot to post:


In addition to this, I produced a little poster for my sentry gun, plus, a physical model of it:


Here's some beauty shots of my sentry:


The screenshots really don't do it justice, it looks so much nicer when you can see it in motion with the mussel flash+laser.

In summary, a good week again, I just wish I'd been able to get a better start on the character project because I need as much time as I can get on the initial 2D/concepting stage. I'm excited to be doing this dichotomous character project, but the idea generation is the part that unsettles me a little (at this moment in time).

Sentry Gun Project - Post Mortem

Problems faced with 3D modelling:
-Tri count: I had to eliminate around 900-1000 tris in order to make the whole model under the budget. It even required me to bake on an edge loop for the ammo just to get rid of a few more tris (190 to 118 for the bullet):


Problems faced with texturing:

-I’d say that there wasn't exactly any problems with the texturing as such because the way I planned it out made it so that I could end up with some carbon fibre, metallic gun, but also have room to play with colours, grunge, and overall feel of it. This drove me to make some shiny alien-like skin which came out fairly good but it could be better.
-The emissive maps aren't hard to make, but I have to admit I found it a little challenging trying to get the kind of effect I imagined in my head. It still isn't right but I think all of the texturing just need refining a bit further to take it to that next level.

Problems faced with Unreal Engine 4:

Small problems with easy fixes:
-Sentry not firing = The collision mesh on the barrel/body was interfering with the ammo spawning.
-Sentry all backwards x2 = Imported facing the wrong way as well as the pivot point’s transform+scale not reset.
-Barrel was floating as it rotated = I put the pivot point in the wrong place… It slipped my mind.
-The mussel flash not spawning where I wanted it to = Move the placement in the game engine.

Summary of the project:

In my opinion, the project was very successful because I fulfilled the brief, and created a fully functioning asset which aesthetically is around the ballpark I wanted to get in after I realised what design I wanted to follow. There were a few things I didn’t get to do e.g. Z-brush sculpting, but it wasn't completely necessary. I did however learn the starter interface for Z-brush, so I am excited to use it in future projects. The normal map wasn't very good, but the overall effect of the sentry gun works well; it looks mean, it hits hard, and the silhouette is very distinctive.

What I’ve learnt:

-Baking normal from high poly to low poly meshes - Basic interface for Z-brush/how to export & import meshes in order to bake them (I only used baking for the bullet, but I still played around with Z-brush which is not seen on the final model - Will be used for my future projects).

-How to use the cascade particle system to a certain extent in UE4.

-To explore the blueprint functions and find what you’re after to work out what exactly it is you want something to do. E.g. Make a sound file play when an event happens.

-How to take ‘beauty’ screenshots properly in the game engine.

-That the modelling/unwrapping time really doesn’t need to be as long as we think – I.e. don’t ‘long it out’, set a deadline to finish it and stick to that deadline. This principle applies to all aspects of the project.

-The sooner you can get something into the game engine and test it/iterate it, the more refined it’ll be at the end of the project; not a rushed thing at the end.

What I would do differently:

-Spend more time on the creation of the normal/roughness maps to really refine my work - make it look a lot more polished.

-Give the concept stage a bit more development - try messing around with more pages of colour schemes to really try and define what look I may like to do instead of going with the first cool idea (I did do experimentation during the texturing stage, but it isn't very evident other than that the final model has a different effect than the page which described what materials I wanted to use.

-I think I could have done with some more 3d experimentation too. I modelled almost right from the orthographics and altered the design a little bit, but It would have been wise to try different shapes and firing systems - It was only towards the end that I realised how nice it would have been to have three barrels instead of just the one.


-I would like to have really defined what look I want to go for using some describing words. This would have helped me in creating a certain feel which would make it more cohesive as a design and therefore, more effective. E.g. If I said "mean, alien, gnarly", I would have been more inclined to perhaps include things which make it look much less like a man-made machine, and more like something which has a life of its own.