Sunday, 9 November 2014

DMUGA Week 6 - A whole week to focus on our projects?!... Yes please! :)

So, we enter the 2nd week of our sentry gun project and I am off to a good start with the modelling. There are so many things I want to do during this assignment, e.g. The 'clown' render - render different parts in simple colours and use them to make selections and paint over them in Photoshop. I want to do sculpting to some extent in Z-Brush and bake the normals onto the low poly mesh. In addition, I'd like to get a somewhat decent paint-over/conceptual drawing of my sentry gun as opposed to just the idea sketches. It'll be a good solid week, I just hope to get the things I have in mind done so I can think about the additions listed above for the final week.

From Monday to Tuesday, both days were literally taken up by the modelling. This wouldn't have taken as long if I didn't have a problem with the tri-count. I have a rather organic shape, therefore I need to use my tris very smartly indefinitely to get the shape I want, and still be within the budget. The problem I had was that the legs, core, and body had a couple of edge loops which weren't entirely necessary for the silhouette I was going for. I did however have to get rid of the bottom 'ridges', but it was a sacrifice I had to make.

Before re-topology = 5963

After re-topology = 4963

Wednesday was the opening of the Leicester media school and we had a good time putting some of our work on show for whoever happened to be walking around that day. In terms of getting work done, I did manage to put it all into the game engine and test the function/firing of the sentry gun. Unfortunately it did take me the whole of Wednesday to unwrap it, as I spent an extended amount of time trying to get the UV's to tightly fit into the texture space.

Scorpion Sentry Unwrap
I had a few problems in the game engine as the scorpion sentry was ejecting the bullet cartridges rather nicely, but the actual bullets weren't being fired. Luckily, Max was around on Thursday to help me with this and apparently, it was the fact that the collision mesh on the barrel & body were interfering with the spawning of the bullet. To easily fix this, I just had to remove the collision meshes and it worked perfectly! By the end of Thursday, I had a partially textured but fully functioning Sentry gun.
I also had a quick play about with the physics of the ejected cartridge to try and get it falling a bit more realistically.

Friday involved finishing the textures to 70% and looking generally well. The only thing I did manage to do was make the roughness & normal maps for it.


Top right = Scorpion / Other 3 = Bullet Texture (SO FAR! - Just the base colour)
Overall, I'd say that I got a fair amount of work done but not as much as I wanted to because I aimed to have all of the texturing finished by the end of this week. I did have to take the weekend off though however as I spent my birthday with my family & friends, but it's back to work now and I'm looking forward to doing the final touches to my sentry gun!

My current aims for the following week are to:
-Get the texturing done
-Do a clown render & paintover/(s)
-Particle or sound effects (Stretch goal)
-Modelling in Z-brush + Baking the detail
-Perhaps play around with a more creative projectile (If time allows)

Sunday, 2 November 2014

DMUGA Week 5 - Make way for the sentry guns! :)

I loved the film project but it's good to move onto something with more creative freedom. I'd like to give the film project another go, but on something much more 'Grand', so on a larger scale, but just doing it for personal work only of course. We have to evaluate our performance on Thursday, but other than that we're fully into coming up with ideas for the sentry gun!

We were officially set the new project on Monday by our 3D tutors, and Max gave a very nice demonstration on what we have to do in UE4 once we've modelled/textured our weapons. The whole day today was pretty much a resource gathering day alongside starting some silhouettes for our ideas.
Here's the moodboard & silhouette page I did:


Life drawing on Tuesday was not my best of days by a long shot... For some reason I just couldn't do things. I do struggle with colour so I think it's good we're doing more this year, but even when I tried to imitate them from an actual painting, they just didn't go. I seriously need to improve my colour work. In addition, I was very glad to here that Heather said we were going to focus on just the head and shoulders next week because the areas I have trouble with are: the head, and fingers/toes.


Tuesday was spent finishing off that 1st page of silhouettes that you see above, as well as starting to decide which route I wanted to go down. E.g. Sci-fi, fun, cartoon-like, wacky etc. In the afternoon lesson with Mike, we got some feedback on how we were going so far and a nicely swift presentation on how he went about doing a paint-over of his 3D model. The keypoints were:
-Selections for easy changes to areas.
-Clown rendering to easily separate different components of the sentry gun.
-Use colour overlays to quickly experiment with different colour schemes.

Here are some more silhouettes I came up with that day:


Internships are a great way to get some good experience in the field you desire to be in, and we had a great little presentation by Ewan (3rd Year) on Wednesday, who is currently doing one at BMW in Germany! How amazing is that? I'd love to be in the situation he's in right now, and all I have to do is compete for a spot... There are so many great artists who'd love to do this so I'd have to really push hard to have a shot at a place. When some more information arises, I'll look into it further to see what I have to do in order to have a go.

That evening, I did even more silhouettes to try to narrow down my options a bit and see where it is I'm headed. I picked 4 of the best ones that people liked the most from the other silhouettes and did a few iterations on each:


On Thursday we presented to Jack our work that we did for the film room project and talked about what went well, what didn't go so well, and how we think the outcome of the project faired against the actual scene. I also went into the life drawing studio to photograph some models of planar heads (Heads which show the planes of the face), and I'm really glad we have these and the fact that the next life drawing will be focused on the head/shoulders. As I've already said, this is one of my weaknesses in drawing people, and I'm glad we can get some time to practice it.

The rest of the week right up until Sunday was focused on the Sentry gun and getting a clear Idea as to what I wanted to make. I also did a quick model for the 50.cal bullet that it will be firing - It's not very high poly, but it's higher than what I want it to be, I'm therefore going to either do a quick bake once I've modelled/unwrapped the sentry gun, or just paint in the normals for it just to knock off a few tris:


I'm pretty pleased with how the idea is panning out, and the orthographics are going to be very useful when it comes to modelling it. I'd say that a couple of problems I may come across is getting the shape right as it is quite organic, and also keeping it below the 5000 tri-limit for the project. This is because a lot of the parts are round, and in order to make them appear that round, I'll need to use my loops very smartly in order to get the shape I want without busting the budget. If you look at the "parts" picture, I have tried to estimate how much I think the legs & tail will take up, and how much they'll leave for me to model the actual body of the sentry gun.

Overall, I'm thoroughly enjoying the project, and I'm really excited to begin the modelling!

Wednesday, 29 October 2014

DMUGA Week 4 - Presenting our film scene/'Post-mortem' :)

The final deadline approaches for our 2nd group project, and I have to admit I'm a little nervous, but excited to see the scene come together to produce the fruits of our labour. I'm sure that we'll get it done on time, I just know that it'll be very tight considering we have a lot of write up to do as well as putting the scene together all within a few days. Ahhh! It'll be ok, heads down and across the line :)

Monday was a really fun and successful day! We (our group) learnt a few tricks from Steve, and we managed to just about get everything into one scene ready to be arranged and materials applied by 8 o' clock in the evening. I actually forgot to make the tiling floor texture alongside the others (I knew there was something I didn't do!) So I made it that very evening for the sake of the deadline we had today to get everything done. It's al-right and I think it'll fit the scene so I'm happy with how it turned out considering I'm totally knackered.


 Considering I made it is just over an hour, it ended up being pretty good!

The rest of the texture sheets are here:


Visual Design on Tuesday was another feedback session with Chris which wasn't as helpful as we wanted it to be because our scene didn't load... Not a big problem though. It was also good to see the work the other groups were getting up to and their almost final scene completed. I'd say at this point I was pleased with what we'd done, we just have to get the lighting & camera angle down and we are all dandy.

Life drawing was surprising because we did have a model in the end, and my drawings weren't too bad. I just wish that I would have drawn mine a little bit bigger and rendered the fabric a bit better. I think I need to make use of the tonal values more as I used the same dark value on the model as I did on the background:


During the self-directed session, we worked a little bit more on the film scene and we managed to get some more textures applied and in the Engine working great. The scene with the assets were pretty much all in there and placed correctly, we just had a couple more to place.
Mikes session in the afternoon was awesome as always! He gave us an introduction into the Sentry Gun project we'll be doing the following week and provided some idea generation techniques - pretty much random from a selection of words to give a brief to meet, and splicing which involves taking two objects and merging them together to create the shape of whatever it is you're aiming for.
For example, I'll take a futuristic sentry gun and merge it with a banana. Now I have a banana shaped sentry gun which fires banana skins everywhere, making characters 'fall' over!

That evening, we stayed in the labs and had everything in engine and tried to sort out the lighting & camera of the scene.


It was very tricky to try and get right, but Lucy & Amanda had a good go at getting the lighting to look similar. They seem to have solved a few problems with dark textures by literally "banging a light in there". It's not the best tactic, but if it gets us one step closer to getting the scene looking right then by all means bang a light in there.

There was a lot of issues with the light-maps, causing random shadows everywhere, but we managed to get 95% of them sorted, so only a couple remain. However, those that remain weren't as important as the issue with the stairs. Here's the resolved light-map for the stairs:


Some other lighting problems which weren't desperate to be fixed for the final scene - the bottom of the walls are red, but couldn't be lowered in the density because the walls were all one object. Therefore, if we lowered the density further, the upper walls would look odd too:


Wednesday so was stressful, and it was another long day in the labs until 9 O' clock! I barely ate the whole day and ended up snacking on some biscuits (which by the way I never do!), but I needed the energy to last me until the labs closed. We spent the whole day trying to put the final things together/final touches on the scene as well as switching between all 5 of us to get the presentation ready for the morning.
The presentation was saved/uploaded at 20:55, 5 minutes before we had to leave... That's certainly not a healthy thing to do. I really do think now that we should have allocated a lot more time to getting the assets in the Engine and sorting all of the problems out, way before the final deadline. Plus, dedicating a decent amount of time on the presentation because a structured, well organised presentation is almost just as important as the work you're showing.

Here's some beauty shots of the final scene:


There was a little mix-up with what documents had to be submitted by Thursday, so I was stressing out over producing everything as well as all of the written design documents/review forms and there was no way that was going to happen for Wednesday night. Fortunately, these don't have to be done until Monday so I was very relieved about that.

On comes presentation day and everyone's work looked so good, so accurate, and well presented! I am amazed at how good everything looks already and we're just at the start of year 2! I was a little nervous purely because the style of presentation (20 seconds per slide, 20 slides) is a good style to have, but it throws me off a lot because I keep forgetting what it is I want to say. I ended up not saying a bunch of really important things which are key to how the group worked well, and how we went about the workflow to ensure that everyone is working from the same template.
It was ok I have to admit, I feel that I could have said so much more which would have been very relevant to how we worked as a team, but we can't go back and change it.

Here's the assets that I made/textured for the project:


I loved this group project though! I think that working in a team is really good fun, you can learn a lot, everything keeps you excited, you can help other people progress, and you all share a common goal to which is to make some that is awesome! It'll be weird going back to doing a single project next week for the 'Sentry Gun'.

Final Comparison:


Post-Mortem:


Summary of the project/What I’ve learnt:

As a very quick summary, I thoroughly enjoyed working in a team to produce this film scene. It held some challenges in the organisational sense, but I have learnt a lot from this experience. Each time I work in a team it will be a little bit different, but at least I know a bit on how to go about it. I like how the scene turned out because the models and textures look professional. However, I do feel that I didn't prioritise the room proportions as much as I should have. Overall, the project was very good, the end product could have been better (as always), but I am proud of what we managed to make, and glad that we chose this scene due to the challenges we had to confront during the process.

What I would do differently:

There's a few things I would do differently but time organisation, work distribution, and priorities are the main ones.

Time organisation: I think we would have benefitted from shifting everything backward in our plan and allocation more time to working in the Game Engine, and constantly checking back to the original scene to see if everything we do, fits the scene almost exactly. It would have been good if we had a lot more time at the end to tweak, learn about cameras in-game, get the lighting right, and work on the presentation much better than what we did. In addition, to have done a model-to-scene comparison check before the texturing stage to ensure that if anything looks wrong afterwards, it can only be the texturing, lighting, or camera (make sure the base mesh is accurate as possible).

Priorities: I didn't actually realise until part-way through the modelling to texturing stage that we had allocated things which weren't in the actual scene. In the back of my mind I was seeing it as a "Stretch goal" to expand on the scene and make the actual set, but this possibly detracted from potentially getting a better end result by having more people work on the important things in the scene itself.

Work Distribution: I think the distribution was okay, but it was apparent that some people had more to do than others. I think this unintentionally happened as we were discussing who wanted to do what in the scene. Next time, it would be good to establish how long we think each asset will take to make and double check with everyone that we are all sure that we can handle the work given to us - Constantly ask throughout If anyone feels they have too much or won't finish on-time/feel they have too little and are taking it easy, so that we can distribute the load more evenly.

Ways to improve personally:


-Learn more about lightmaps and how to make them correctly/avoid errors in engine.
-Spend additional time on the 2D aspect.
-Look at different kinds of materials in real life and how to replicate them as closely as possible in the game engine.

-Stick to the initial deadlines set within the project to make sure we’re all on track and using our time as efficiently as we can.

All is done now, I just had to write up the design documents over the weekend and prepare my mind for the creativity side of the 'Sentry Gun' next week.

Sunday, 19 October 2014

DMUGA Week 3 - Everything is coming together... Hopefully! :)

Things are going so fast as we're already through the third week into my 2nd year at DMU! Our first project is only just under a week until hand-in day and it is nice to see how our scene is fitting together.
It is quite difficult to get a group's efforts to fit together and look like they belong with each other because we all have different modelling and texturing styles/techniques/ideas which yield different
looking results. However, I think it is going al-right and we have worked well together!

On the Monday, I spent the whole day modelling/unwrapping my part of the scene which is the structure. This includes all the trim, the staircase, the banisters, walls, doorways and doors. I took on this role because I thought it would be a great opportunity to get stuck in with interior modelling which actually makes sense in terms of how it's built (Not just placing planes here and the for the walls etc).

Everything has to be made to scale as well, which is something we've had to consider as a group, but we have all based our models off of the original block-out I produced earlier on in the project. This
gave us a good base to work from because we all have to same scene. Therefore, when it comes to putting it all together, there is no need for a lot of tweaking/essentially wasting important time.

My job role is taking much longer than I expected it to because I'm trying to make it as accurate as I can, but that in itself takes up a lot of time, let alone the modelling/unwrapping! Anyway, here's the
stage I got to on Monday:


A lot of progress was made, but a lot more has to be done.

Tuesday was a very productive day! I managed to model/unwrap a lot of my assets, we put most of them into the scene,  and scaled them accordingly. Everything is coming together very nicely, there are a few problems with the perspective but it's beginning to become a painful area because I've tried so much to match it up, but because of the lens that the scene was shot in, there's a few things that don't quite add up.
Nevertheless, the scene looks awesome and I can't wait to finish unwrapping/modelling the lot and get onto texturing! We did a very quick spot check to see what it looks like and here it is at this moment:


The morning session with Chris was about the colours used in films and one of the most memorable slides from the presentation was one which had a screenshot every 10-30 seconds throughout the whole film all put in sequence and it was amazing to see how the colour palette changed. These palettes effected the mood of the film which related to the events that were happening at that time. Here's a breakdown of Black Hawk Down:


Mike's afternoon session was also very informative as always, he went on to explain the importance of value control in our paintings as it helps draws the eyes to where you want them to focus as well as make your image 'pop' - The readability of the painting is hugely impacted by the use of the values. He also explained how having a very strong silhouette can mean that the rest of the design should work provided it isn't just awful. You can identify a memorable character through the silhouette, and thisalso translates into very small images because on a tiny screen you'll still be able to identify everything, despite not being able to see any detail.

Here's one of the silhouettes I designed for my character over the summer:


As you can see, the silhouette is pretty much there and it just needs some more tweaks to get it a bit more polished. My final character didn't look anything like this because I didn't follow it as I should have. Also, mine didn't have a cloak/hood because I was struggling to fit it all in the 5000 tri limit, but that was because I tried to make the face a little bit higher poly and ended up not making enough room for other details I wanted.

Wednesday was pretty much a 3D modelling day... Wooooo! I aimed to get all of my modelling done by Tuesday, but this didn't happen until Wednesday night. I think this is because I didn't take into account extra time for unwrapping, but everything (pretty much) is unwrapped how we want it, we just need to crack on with the textures now.

The following day however, involved another feedback session from the tutors & peers. I was feeling good about the current scene we'd rendered in max as a whitebox:


I thought it looked all well n' good for the assets we have done, it just needed the others/finishing touches to it and the scene would be modelled completely. However, Mike pointed out that the horizon line was way off and that the camera shot/setup was all wrong! I looked at it and immediately realised how wrong it was. This made us really focus on the fact that we have to get the camera lens and angle right for it to look good. After the presentation, I immediately went to the labs to try and sort it out and this is currently the best shot I have using 3ds max of our scene:


This was much better, but still a few small issues remain with the placement of assets. I can try to get a decent shot in UE4 using the depth of field and aspect ratio settings on the camera and I think it'll be good enough.

We planned to get a lot of texturing done on Friday alongside some of the card modelling. Unfortunately, the card model was taking far longer than we anticipated and we ended up just about getting it

finished by the end of the day. Here's a few pics of the model:


Some part of the model were really successful e.g. the walls, the measurements for the doorways etc, but as we realised we had less time to get it done, some of the assets were just made to fit by eye. Even though it looks nice, the actual scale of some models were a bit off. Nevertheless, I like how it turned out and couldn't wait to get back to unwrapping the last few bits and texturing.
I started texturing that night by doing the wood texture which will be used on a lot of the models, plus the ceiling texture. They're not the best, but due to time constraints, they'll have to do unless we get
time at the end for tweaking.

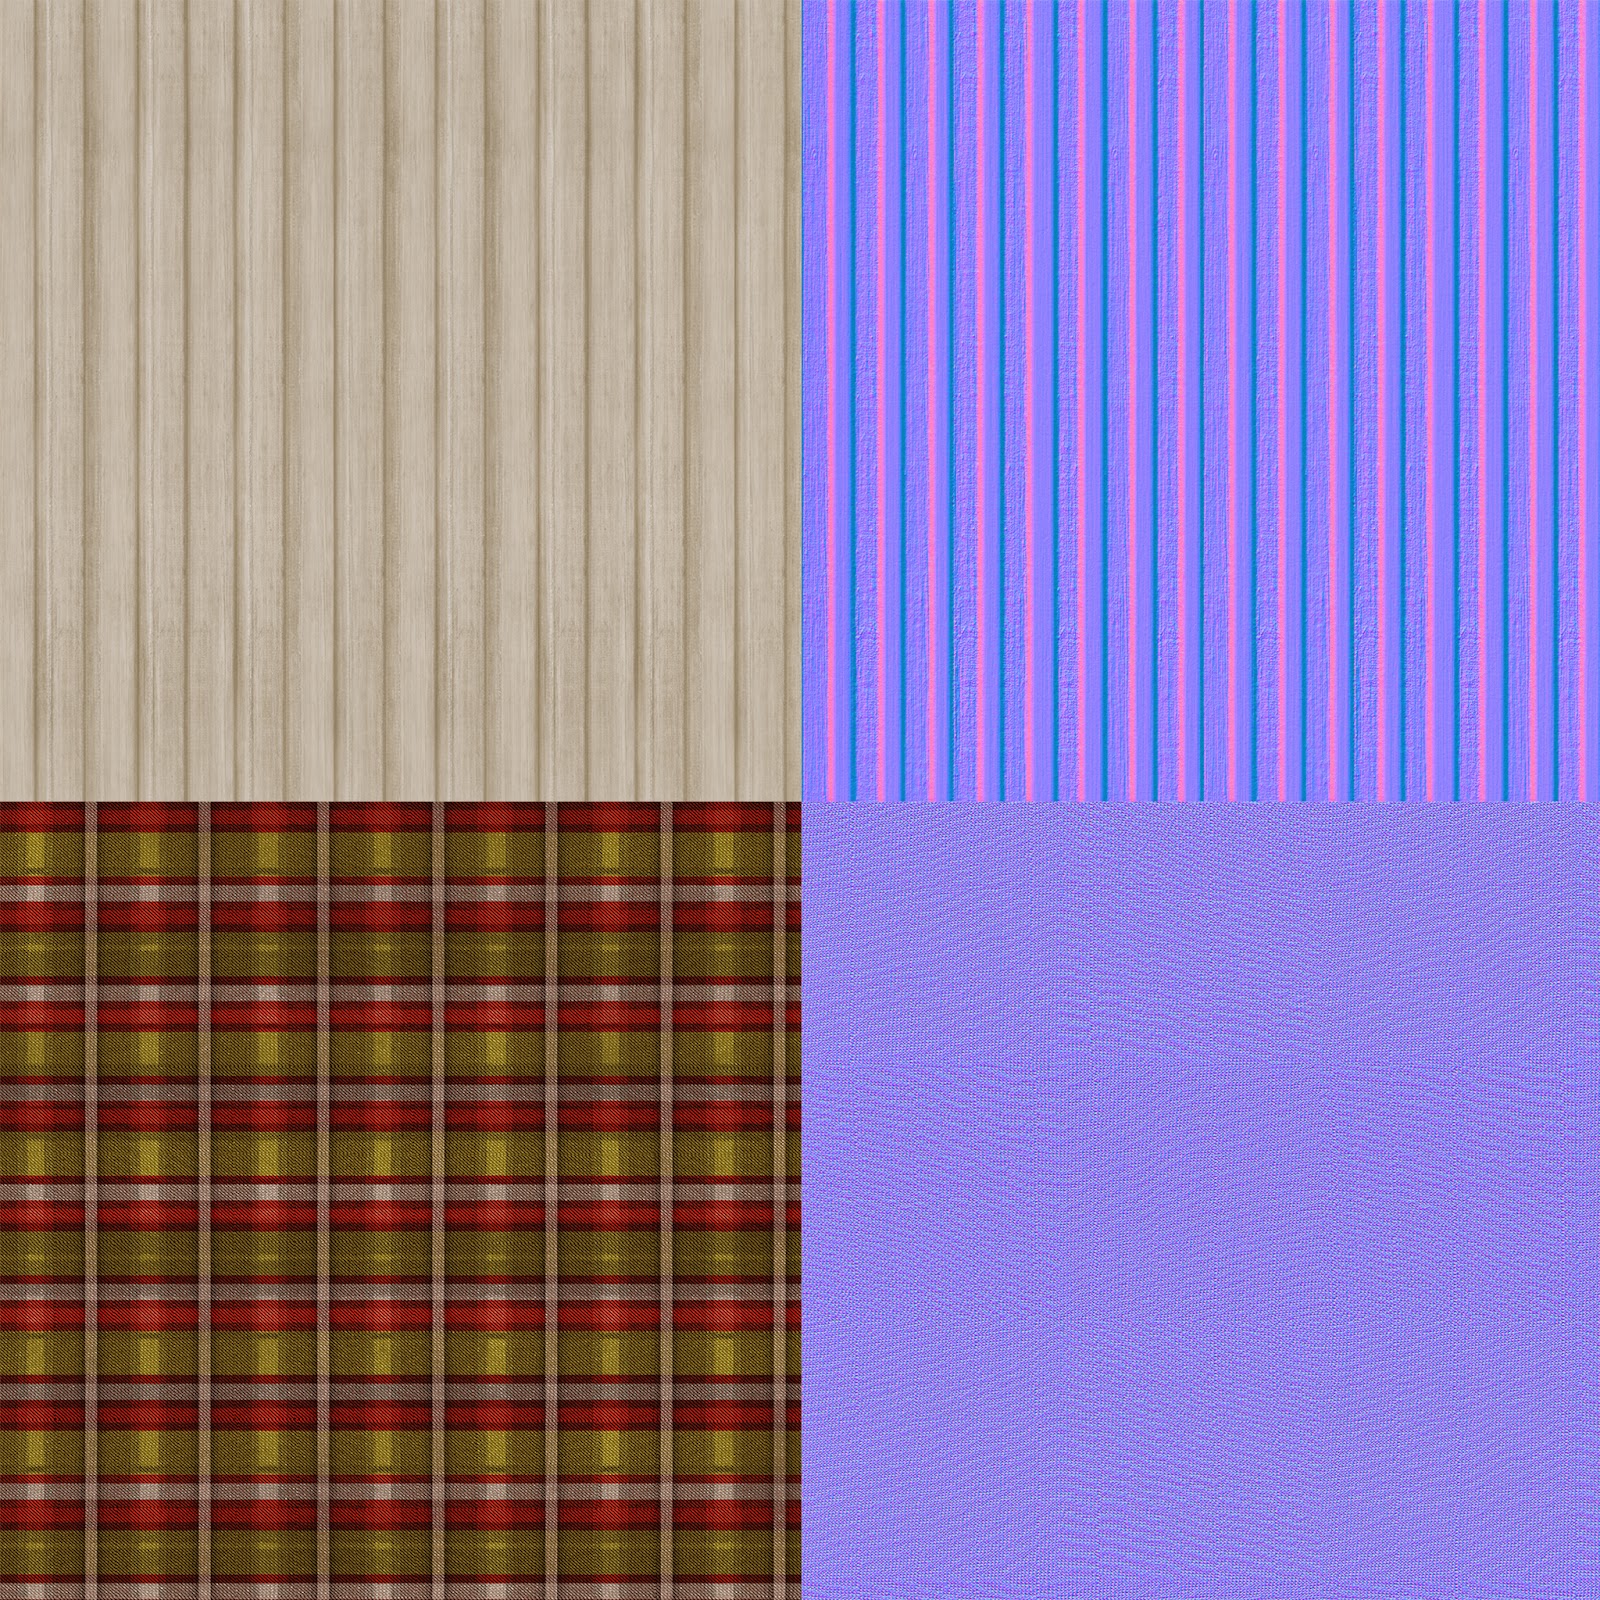
Over the weekend, I worked on the Tartan carpet running up the stairs (which by the way, is very hard to make from scratch!), the wall wood panels, wall paint, and 2 other wood textures.


These are just the albedo and normal map textures, roughness maps have also been made for them.

Another good week has passed, but I'm excited to just finish the scene and do the lighting in engine to hopefully make it look even better. I also really want to move on to the next project because at the
moment it's unknown and that always excited me in 3D when we don't know what we could be doing next! I'd like to get to grips with making realistic textures using PBR, but I don't think that'll happen - I just assume they want us to learn that in our own time unfortunately. Anyway, hopefully it'll be something really cool and will be another group project because I have found the experience so far generally quite fun!
Onwards and upwards to the finalisation/presentation of this project! :)